Installing the DNN Connector (SharePoint 2010)

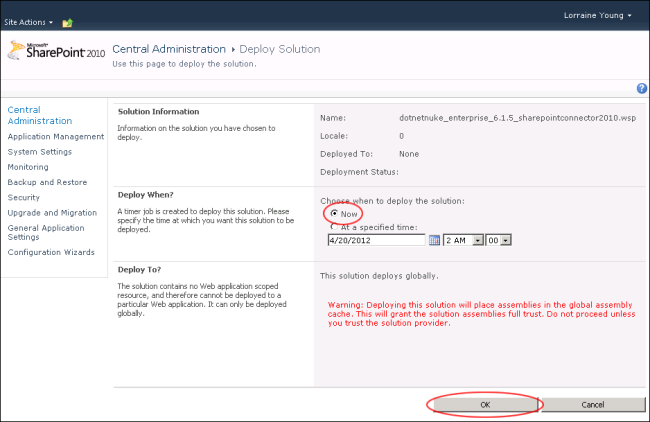
How to deploy the DNN Connector to a SharePoint 2010 server. This task is performed by the SharePoint Farm AdministratorRegistered users who are members of the Administrators role. These users have full access to manage the site including adding, deleting and editing all pages and modules. Administrators also have access to the Admin pages located on the main menu..

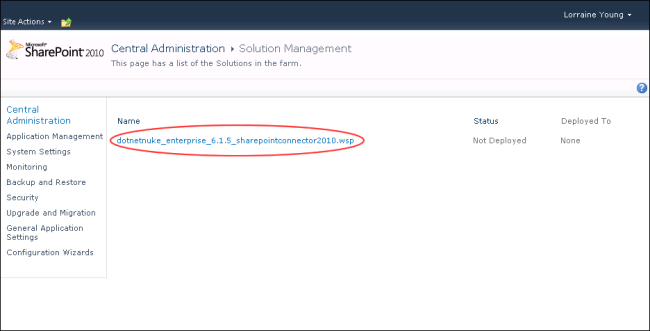
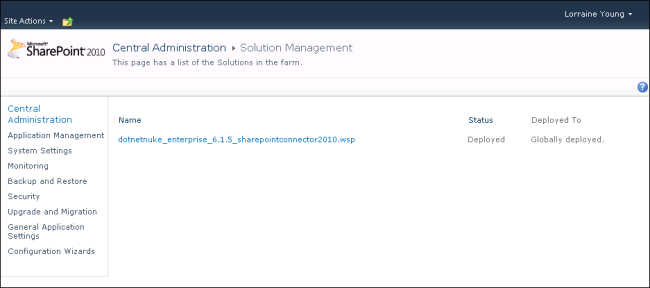
Prerequisite 1. The DNN Timer Job file available from the Customer Success Network is required to complete this task. The default Timer Job name is "DotNetNuke_Enterprise_6.1.5_SharePointConnector2010.wsp".

Prerequisite 2. Full Trust must be enabled on the DNN site by a SuperUserThese users have full access to manage the settings and content of all sites with this DNN installation, including the Host site. SuperUser accounts are created using the Host > SuperUser Accounts module.. See "Enabling Full Trust for DNN Sites" Note: Failure to undertake this task prior to configuring SharePoint Connector will result in the following error message "That assembly does not allow partially trusted callers. The DNN server has rejected your request to pair". If this message is displayed, full trust must be enabled and then the final step of the below tutorial must be repeated.

Prerequisite 3. Appropriate role security levels on the SharePoint server must be set. See "Managing Roles Security for SharePoint Connector"

  1. Go to the SharePoint Server.
    1. Paste a copy of the wsp file into the c: drive.
    2. Click the Windows Start button.
    3. In the Search box, enter cmd and then press and hold the Ctrl + Shift + Enter keys. This opens the Command Prompt window in elevated privilege mode.
    4. In the Command Prompt window, enter the below path. Note: This path must be typed into the Command Prompt. "C:\Program Files\Common Files\microsoft shared\Web Server Extensions\14\BIN\stsadm" -o addsolution -filename" c:\DotNetNuke_Enterprise_6.1.5_SharePointConnector2010.wsp"
    5. Strike the Enter key. The "Operation Completed Successfully" message is displayed.
  2. Go to SharePoint Central Administration.
    1. Navigate to Central AdminRegistered users who are members of the Administrators role. These users have full access to manage the site including adding, deleting and editing all pages and modules. Administrators also have access to the Admin pages located on the main menu. > System Settings > Manage Farm Solutions. This opens the Solution Properties page.
    2. In the Name column, click on the Timer Job file name. E.g. DotNetNuke_Enterprise_6.1.5_SharePointConnector2010.wsp

    1. Click the Deploy Solution link. This opens the Deploy Solution page.
    2. In the Deploy When section, ensure the solution is set to deploy Now.
    3. Click the OK button to confirm.

  1. The DNN SharePoint Connector solution status is now listed as "Deployed" on the Solution Management page.

Next Step: The DNN Connector must now be activated for each SharePoint site where it will be used. See "Activating the DNN Connector"